My 2 year sabbatical is coming to an end. For the upcoming year I'll be offering limited private sessions only. The fall session is full and I do not keep a waiting list. Please just email me later in the fall if you are interested in sessions for winter 2023.
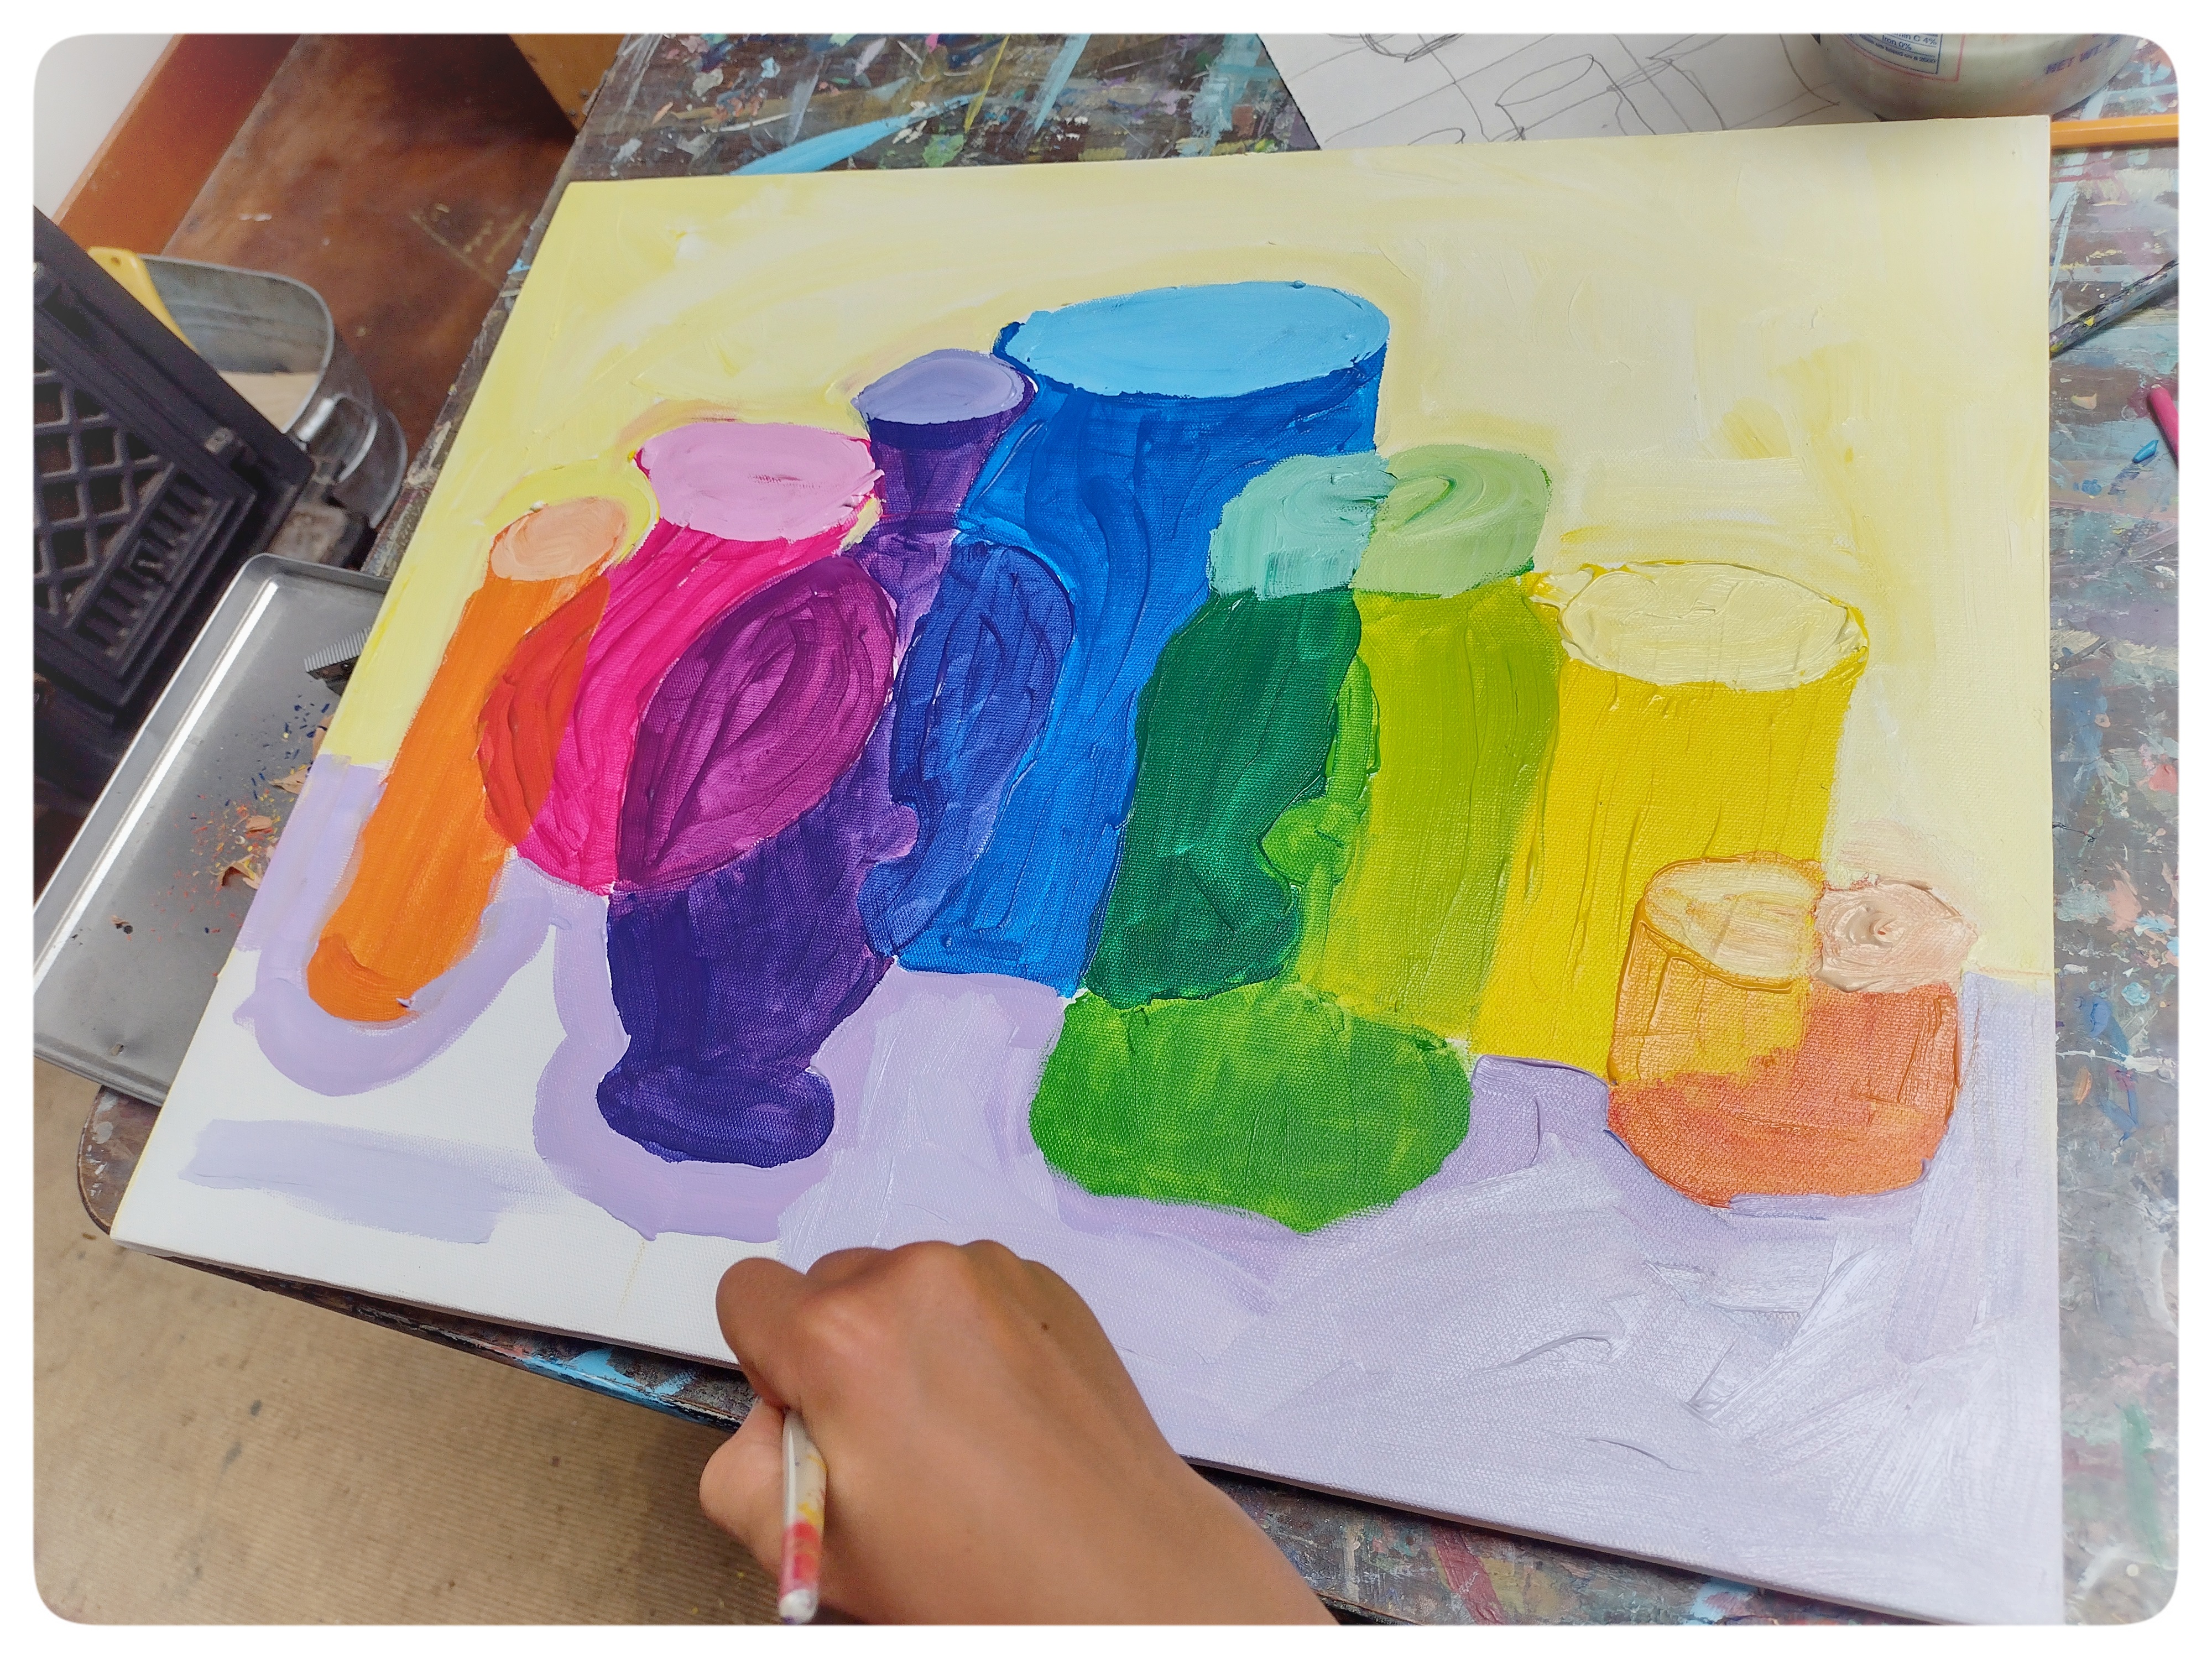
This summer I offered limited 1-1 sessions, an intensive short summer session in August. Here's a look at one of our projects.
Acrylic on 12x16 canvas. This project covers so much!!!
Using only primary colors, black and white we mixed secondary colors and tints. We then reviewed complimentary colors, analogous colors, warm colors and cool colors, tints, shades and the
color wheel.
Step 1. We did a few quick sketches using the
rule of thirds to establish our composition, or placement of of the objects in the still life before beginning work on the actual canvas.
Step 2. Using colored pencils and the quick sketch as a reference for the placement of the vases, draw the back row first, noticing that all the object are in a line with just a little space in between each vase. Pay attention to the sizes of the vases in relationship to each other, height and width.
Step 3. Draw the front row, overlapping the back row. Once again paying attention to their heights and widths in relationship to the other vases. The overlapping sections are where the secondary colors will be painted.
Step 4. Paint the back row with the primary colors. Secondary colors are used to paint the front row. The overlapping sections are where we mix the secondary colors with more of the primary color to create variations. Make sure the violet vase is between the blue and magenta vase. The green vase is between the blue and yellow vase and the orange vases are on the ends because yellow and magenta make orange! Acrylic paints require 2-3 layers. Let each layer dry before adding the second coat. Don't smooth out your brush strokes let them show, thats why its called a painting!
After our first day of painting I realized I didn't allow for ORANGE!!!! so we added a smaller object to either side of our still life! Problem solved thanks to our allowance of negative space.
Step 5. Mix tints to paint the openings of the vases. Always add a small amount of your color to the white paint to create a tint. This will give you much more control over the color as well as the amount of paint you mix. For this project just a small amount of each tint is needed. Notice that the overlapping areas have also changed their tint color to correspond with overlapping complimentary color. The outlines were painted with red mixed with just a bit of black. The background colors are complimentary colors, yellow and violet. We ran out of time but the next step would be shadows.
I use plastic lids for painting pallets. When mixing colors, keep your piles small, the idea is to paint your canvas not paint your pallet. To clean up spray the dried up paint with water and scrape, peel it off after 10 minutes.
To store acrylic paint for the next day, mist it with water. I place a raised cooling rack with a damp towel on it over the paint and then plastic, covering the whole thing, tucked in on all sides. Or place the actual container on top. This keeps my paint moist for the next day.
To store acrylic paint for the next day, mist it with water. I place a raised cooling rack with a damp towel on it over the paint and then plastic, covering the whole thing, tucked in on all sides. Or place the actual container on top. This keeps my paint moist for the next day.
Pay attention to the negative space on the top, bottom and sides of the canvas. The space are similar, giving the objects some room on the canvas but at the same time filling the canvas. We drew with colored pencils so that any lines would become a part of the painting and not show up as pencil lines and distract from the colors.
There is lot of planning and time we required for this project. Allow 5 hours, we did it over the course of 2 days and ran out of time for shadows. I would recommend this project for ages 10 and up.
Don't waste that lovely paint! Grab a little canvas and play. After all those rules, have some fun and use up all the paint with something abstract. It is harder than you think and will be a fun work in progress.