Thursday, November 19, 2020

100 Day Art Challenge and Travel Log

 I have officially started a 100 day art challenge, I hope you'll follow along IG account


During the next 100 days I'll be posting a 5X7 watercolour painting each day. Some days it'll be a work in progress, other days a finished piece. All inspired by my travel photos from over the years. I have A LOT of travel photos. I am always documenting thinking I'll draw from them. Usually a small body of work or sketchbook studies happen during or just after a trip and then  I move on to something else. Well, I am so thankful to have all these photos to flip through. 

Summer of 2019 we did a month long self drive road trip through Botswana. Starting and finishing in Johannesburg, throughout Botswana to Victoria Falls in Zimbabwe.  No guides, no fancy safari camps, just an Overland vehicle and our family of 4! It was a total adventure and we can't wait to get back to Africa.

We camped at Planet Baobao, Gweta, Botswana, just follow the signs...this place was awesome! One of the coolest campsites we have ever been to and a welcome treat after camping in the bush!
The most beautiful painted rondovals and of course the Baobao trees are incredible.


Day 1

Day 2


A day trip to Victoria Falls, we couldn't drive in because our rental was only insured for Botswana and South Africa. We planned a day trip from Senyati Safari Camp to Victoria Falls, its not very far but much simpler to go with a pre-arranged driver through the camp. Crossing borders in Africa isn't exactly straight forward, we appreciated having someone else drive. 

Day 3

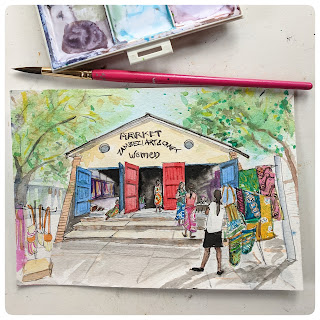
I'm not much of a shopper at home in Seattle. I like to keep up with basics and  hit the thrift store on a regular basis. But when I travel I generally buy a large cheap duffle bag to bring home the haul. Carry on bags only on the way there and checked bags coming home.  I was quite happy supporting the crafts people on our trip!

Day 4


...and a few more from Botswana


This bridge crosses the Zambizi river from Zimbabwe into Zambia. Had to cross it, what we did not do was Bungy Jump off the bridge.


Monday, October 26, 2020

Painting Series from travel photos

Classes are still on hold, I'll be back teaching in the studio sometime next year, but until then I am on sabbatical and hope you'll follow along.

My son headed off to college this summer and I quickly reclaimed his room.  A thorough scrub down revealed multiple work surfaces and good natural light! I added a rug and a nice quilt to the lofted bed and that was about it. My new studio space was ready.

In my last last blog post I shared my entry for the Dear Ballard greeting card fundraiser. That seems to have been the starting point for my new small body of work which I have titled #fromwhenwecouldtravel
I am so thankful for all the travel opportunities that I have had. Going through the thousands of photos brightens my days and fills me with inspiration. I had a watercolor block of blank postcards that I started with and have since moved onto a 5X7 block of watercolor paper. I get up everyday excited to make my morning Chai and get started! 


The journey starts in Burano, Italy....


A number 8 brush and whatever watercolors I had on hand.


Ikea road trip for some frames. 


Sunday, September 27, 2020

Sketchbooks, drawing, painting, daily practice

The studio is still closed. I'll open up again when it is completely safe. Until then I'll be taking a sabbatical, sharpening my pencils and filling my sketchbooks. I treasure all the photos I have from passed travels and am really enjoying sketching from them. They may just stay in the sketch books or become small cards. Lets see where it goes. 


One of favorite places, Burno, Italy. I could spend a month here just drawing and painting everyday, all day. #fromwhenwecouldtravel


These 2 will be part of the  Dear Ballard Greeting Card Campaign that will have handmade cards available October 1st,  all funds raised going to charity.  A great project that got me started painting again.


I've also started working on my Urban Sketching and quick figure drawing skills....so much fun! A friend recommended SkillShare and in particular James Richards Urban Sketching classes. I highly recommend it!


 ...and I'm brushing up on my french with Duolingo


Bonne Journee!

Tuesday, July 14, 2020

Journaling and Sketch book ideas

Here's the latest YouTube video, this time around a look at a sketchbook  that I made for my son. He just graduated form high school,  so his last page includes his graduation announcement!

Remember to subscribe to my YouTube channel. New videos are posted every week or two.


These are the 8x10 basic black sketchbooks I have kept for my kids. They both had their first 10 years very well documented and then I did recaps a few times a year. 


The elephant card was the starting point for these 2 pages. I quickly covered the page with orange ink to match the card, carrying the ink loosely over to the other page. The scribbles were already there, so I wanted to keep the brush strokes messy as well. With large pages I generally block in color quickly, letting the brush strokes show.  I like to cut out photos of people really tight, so that they can become a part of their new landscape. White paper with notes on it was glued down before orange paint was added, the text becomes texture in the background.


The half face is my grandpa. I was working on a larger project and had a few extra xerox copies of him and collaged them on various pages. I decided to crop his face to line up with the center of the page. Using whatever paint was left over at the end of the day I blocked in the background. I also would have randomly painted a few more pages to finish the paint. Another cut out of my son so that he is looking into the page. 


Sketchbook pages evolve over time. I will go back through a book and add some color to a page or pages that were started many years ago, or add a bit of collage. If something doesn't turn out, it can be covered with collage. The sketchbooks are also filled with journal entries. Often the journal entry is the starting point. I'll write in any direction, any color. A color theme is one element that can bring  order to a page.  


There are lots of attachments in the books as well. The envelope has been printed with a map, another left over from an old project. I stuffed the envelope with a Christmas card and some school photos.


I usually have a few sketchbooks that I am working on at the same time. One is set aside for just travelling, another for daily journal entries and to just have with me so  I can sketch or write anytime.  


This was my last travel journal, the paint brush gives you an idea of size. I fit the journal, this small watercolor kit, 2 brushes , a couple pencils and a few markers all in a sandwich size ziplock bag. This was for a 1 month trip. We always travel light, so i just pack the essentials for art making. 


Let your sketchbook be a place to explore thoughts and ideas, and experiment with materials. What are you going to do in your sketchbook?


Ciao for now!

Tuesday, June 9, 2020

Still Life Drawing Lesson

Check out  both the timelapse video and the lesson on my YouTube channel!
Remember to Subscribe! New videos every week or two.


For this lesson you'll need 3-5 glass bottles, jars and or containers of different sizes. At least one should have a square or rectangular bottom. In the first drawing place all your objects in a row with the tallest object in the middle.

1. Start drawing the tallest object by making small marks on the page to indicate the bottom and the top before you  begin the actual drawing.

2. When drawing the next object, compare its height to the first object and again make a small mark to show how tall it is. This is your reference mark to not not draw the oject larger than the mark!!!!! Compare them in width as well as how much space is between them. Is the object round on the bottom or square? The round jar needs to be drawn with a curved bottom as well as a curved top. The top is drawn as an oval or ellipse.  The green bottle has a square base as does our center bottle so those are drawn flat on gthe bottom. All 3 objects are round at the top and will be drawn as ellipses.


3. For the next Drawing stagger the objects to show one in front, one in the middle and one behind with all of them overlapping.

4. This time we'll start with the jar on the left which is in the middle as far as our back to front placement. We always compare objects to each other to get their proportions and placement correct. Use your pencil to take rough measurements. Notice the glass in front comes about half way up the jar. The small orange glass is behind the jar so it needs to be drawn slightly higher on the page to show that it is behind. The orange glass is still smaller than the large jar so make sure the top of it is lower than the the top edge of the jar. Remember to include a line that shows the back of the table. Pay attention to where the line is in relationship to your objects!


Let's do it again with colored chalk pastels. First in a row.


Then staggered. Draw right on top of each other to show the overlap. Be sure to use different colours.


My fancy set up! The ruler was my tripod for the first few videos!


Remember the basics, is it in front or behind? Compare objects to each other to draw the sizes accurately. Pay attention to height, width and shapes. pay attention the the base, is it round or flat?Use an odd number of objects and place the objects in an interesting arrangement.


Monday, May 11, 2020

Tulip Painting Lesson

Its coming to the end of Tulip Season in the north west but they are still going strong in my garden. Every year I either paint them, draw them or use them as subjects for original prints. I made a little time lapse video of the painting process as well as full painting lesson. Follow me on YouTube at Ameen Dhillon. I'll be posting videos about once a week. 


 The cropped version for an Instagram shot...


This is a recycled canvas, I painted directly on top of a painting that I did not like. Acrylic paintg comes alive when you paint in layers, so recycling an old canvas is works beautifully. Don't prime it with white, just start painting.


As I prepare to shoot the videos the first painting is always a trial run. The second video gets me closer and the 3rd is the one I finish with.  I do like the 3 paintings together as a triptych. each one is 4x12 to emphasis the the long graceful tulips.


Here's my trick for keeping acrylic paint from drying up. I use the plastic lid of storage boxes as palettes, give the paint a mist of water when you are done for the day and cover with the container. The next day you are ready to paint where you left off. Give it a daily mist to keep the paint moist.


Tools for this project...

Tuesday, April 21, 2020

How to Draw Portraits

With the studio closed I have been working on my YouTube channel. My older students were getting ready to do self portraits so I am starting off with 4 part series on Portrait Drawing. The first 3 lessons focus the details of drawing each feature. Lesson 4 (coming very soon!) we put it all together with the proper proportions. Please check it out and subscribe!!!! Its aimed at ages 9 and up. 

Gather your materials: 

1. A front view self portrait at least 5X7" (a school portrait would be perfect, you want something that shows shadows) 
2. 2b or 3b pencil (HB is fine if that is all you have)
3. pencil sharpener and an eraser. 
4. 9x12 sketchbook (or 8X10 but not smaller or copy paper if that is all you have)

I'll walk you through steps of the each feature and you'll practice it on your own 3-5 times. 
I am using a picture from a magazine  but I encourage you to use a portrait of yourself. You'll be spending a lot of time on this portrait, it's a great record of where your drawing skills are at right  now.

I mask off everything except for the eye and its surrounding area. We'll closely observe just the eye and draw it 3-5 times. Practice, practice, practice! 

Lesson 1: How to Draw Eyes


Lesson 2: How To Draw the Nose


Lesson 3: How to Draw the Mouth


Stay tuned, the next lesson on drawing the whole portrait will be out this week.

Wednesday, April 8, 2020

Block printing projects for kids and adults

Our winter Block Printing class got cut short because of school closures this spring. I did have 2 students that were able to print their finished relief prints. 

This session started with students choosing from 4 different still life arrangements in the studio.

Step 1. Students did 3 thumbnail sketches of different ideas of their selected still life.  We talked about the characteristics of a block print and what makes it different than  other mediums. Students took this into consideration as they developed their ideas.

Step 2. We talked about illustration, composition, positive and negative space, pattern and design. Students selected their favorite sketch and we developed it further considering all of our design elements.

Step 3. We blocked out black and white areas, trying to have them alternate and having a ratio of 50% carved (white) and 50% to remain black ( the inked areas). 

Step 4. Carving the block

Step 5. Printing!


Although we did not have a chicken as part of the still life, the still life arrangements are a starting point. Student creativity is always encouraged!


We simplified the outer border so that it would be a stronger design and easier to carve. I also loke the way the triangular pattern repeats in the strings of the drum.


A playful design with all three objects being the same size. We continued the carved lines on 4 sides of the objects to create a frame.


Still life with arrangement.


Work in progress.


Thumbnail sketches, such an important step when planning any project.


My little press, oh how I love it so...


Wednesday, March 25, 2020

Art Ideas for self isolation

The studio has been closed for a few weeks now and I am missing all the creative energy my students bring. I'll be checking in towards the end of April and hope to have an opening date then. Until then #stayhome and get creative. Draw anything. Start in the kitchen and pick a few things and draw (paint, collage, sculpt) the same thing 3 different ways. Don't forget to have something in the background and some space in the foreground.

With my private students we had just finished up a few weeks of still life studies.

We started with continuous contour line drawings (no lifting your pencil from the paper) of the pear and limes. Draw slowly, pay close attention to all the details, more time should be spent observing the subject than the actual drawing.


Students then used a "sketched line" to draw the same still life and added shadows.


...and then we did our watercolor studies. Start with a limited palette of colors and learn the full range of of what they can do!


My 9th grade student.


My 4th grade student.


Our models.

Related Posts Plugin for WordPress, Blogger...